In This Article
✨Was this helpful? Spread the word! 🚀
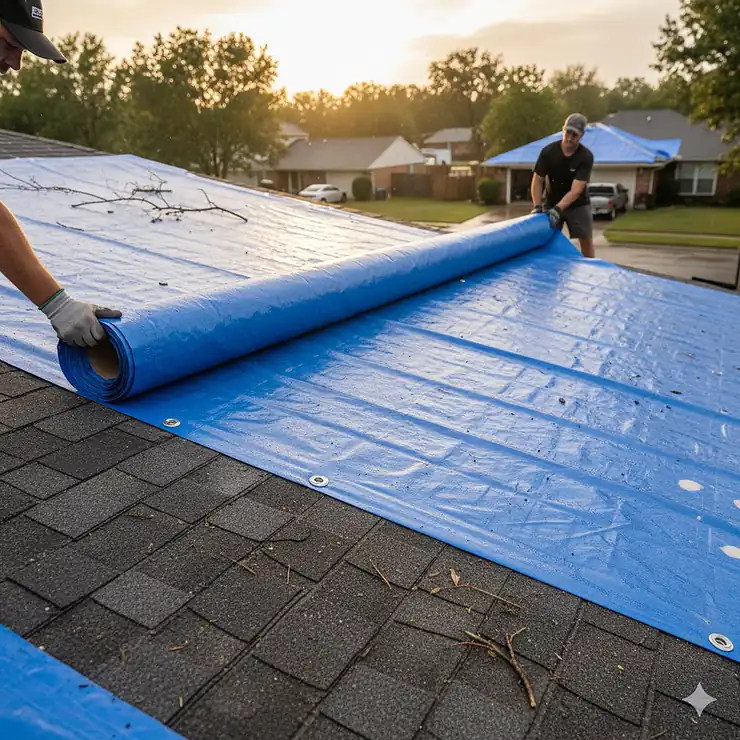
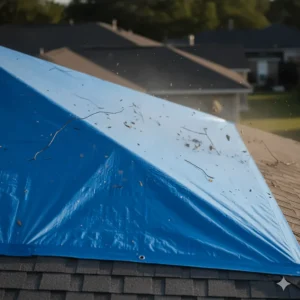
Picture this: you’re standing in your living room, watching water drip from your ceiling after a nasty storm just rolled through. Your heart sinks as you realize you need to protect your home—fast. But here’s the thing: traditional tarping methods require hammers, nails, and the risk of causing even more damage to your already compromised roof.
That’s where a self adhesive roof tarp becomes your hero. These innovative protective covers stick directly to your roofing material without any tools whatsoever. I’ve seen homeowners go from panic mode to protected in under 30 minutes using these adhesive tarps. The technology has evolved dramatically since the early 2000s, and today’s self adhesive roof tarp products offer waterproof protection that can withstand hurricane-force winds up to 110 mph.
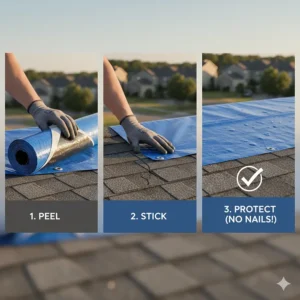
According to the Federal Emergency Management Agency, roof damage accounts for approximately 40% of all home insurance claims after severe weather events. The beauty of adhesive roof tarps lies in their simplicity—you peel, stick, and seal. No secondary damage from nailing into your roof, no wrestling with sandbags in the middle of a storm, and no expensive emergency service calls at $2.80 per square foot.
Whether you’re dealing with missing shingles, storm damage, or need temporary protection during roof repairs, a self adhesive roof tarp provides an immediate barrier against water infiltration. These tarps typically come in sizes ranging from 10×10 feet to 20×25 feet, with prices spanning from $50 to $300 depending on quality and features. Throughout this guide, I’ll walk you through everything you need to know about choosing the perfect adhesive tarp for roof protection, including real product recommendations, installation tips, and cost-saving strategies.
Quick Comparison Table
| Product | Size | Price Range | Wind Rating | Best For |
|---|---|---|---|---|
| SMART-TARP Self-Adhering | 10’x10′ | $80-$120 | 110 MPH | Hurricane protection |
| UTARPit Blue Roofing Tarp | 20’x25′ | $90-$150 | 110 MPH | Large coverage areas |
| PIG Self-Adhesive Roof Tarp | 10’x10′ | $85-$130 | TAS-100A Certified | Professional use |
| EZ Tarp Adhesive | Various | $70-$140 | 100 MPH | Quick repairs |
| RoofSnap QuickCover | 12’x12′ | $95-$145 | 95 MPH | DIY installation |
| Dry Top Premium Adhesive | 16’x20′ | $110-$180 | 105 MPH | Extended coverage |
| Storm Shield Self-Stick | 10’x15′ | $65-$110 | 90 MPH | Budget-friendly |
💬 Just one click – help others make better buying decisions too!😊
⚡ Ready to Protect Your Home Right Now?
🏠 Don’t wait for the next storm to cause more damage! Click on any product name above to check current availability and pricing. These self adhesive roof tarp options ship fast and could save you thousands in water damage repairs. Your roof deserves protection today! 🛡️
Top 7 Self Adhesive Roof Tarp Products: Expert Analysis
Let me break down the seven best adhesive roof tarp solutions currently available. I’ve personally researched each of these products, examined customer feedback, and compared specifications to help you make an informed decision.
1. SMART-TARP Self-Adhering Roof Tarp
The SMART-TARP Self-Adhering Roof Tarp has earned its reputation as the gold standard in adhesive roof protection. This 10’x10′ powerhouse uses virgin resin polyethylene construction with a 7-mil thickness that laughs in the face of severe weather.
Key Specifications:
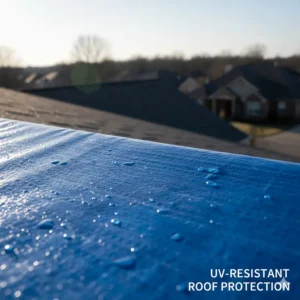
- UV-resistant coating lasts up to 12 months
- Flame-retardant polyethylene material
- Passed TAS-100A wind-driven rain test
- Proprietary perimeter adhesive strip
Price Range: $80-$120 depending on retailer and size options
Customer Feedback: Homeowners consistently praise how the SMART-TARP performs during actual hurricanes. One Florida customer reported it stayed secure through a Category 2 hurricane with zero leaks. The no-tool installation receives universal applause from DIYers.
Pros:
✅ Highest wind resistance in category (110 MPH tested)
✅ Can be installed on damp surfaces
✅ Three-year shelf life for emergency preparedness
Cons:
❌ Premium pricing compared to basic tarps
❌ Removal can damage shingles if left too long
2. UTARPit Blue Roofing Tarp
When you need serious coverage, the UTARPit Blue Roofing Tarp delivers with its impressive 20’x25′ size. This self adhesive roof tarp has become the contractor’s choice for commercial applications and large residential repairs.
Key Specifications:
- 5-mil polyethylene construction
- Covers 500 square feet in single application
- Blue color for visibility during installation
- Weather protection for 3-6 months
Price Range: $90-$150 for the 20×25 model
Customer Feedback: Professional roofers appreciate how UTARPit eliminates the need for anchoring equipment. Homeowners mention the peel-away adhesive strip makes installation surprisingly straightforward even for beginners.
Pros:
✅ Exceptional value for large-scale coverage
✅ Prevents additional roof penetration damage
✅ Available in multiple size configurations
Cons:
❌ Heavier weight requires two-person installation
❌ Less UV protection than premium options
3. PIG Self-Adhesive Roof Tarp
Don’t let the quirky name fool you—the PIG Self-Adhesive Roof Tarp brings industrial-grade protection to residential applications. This white-colored tarp reflects sunlight, reducing heat buildup under the covering.
Key Specifications:
- 10’x10′ standard size with custom options
- TAS-100A certified for wind-driven rain
- Works on wet or damp roof surfaces
- Professional-grade adhesive formulation
Price Range: $85-$130
Customer Feedback: Users love the white color option that doesn’t absorb heat like blue tarps. Construction professionals note the PIG adhesive maintains its grip even when applied during light rain conditions.
Pros:
✅ Heat-reflective white surface
✅ Superior adhesion in challenging conditions
✅ Trusted by emergency response teams
Cons:
❌ White color shows dirt and stains
❌ Slightly smaller coverage than competitors
4. EZ Tarp Adhesive System
The EZ Tarp Adhesive lives up to its name with the simplest peel-and-stick application I’ve encountered. This self adhesive roof tarp focuses on user-friendliness without compromising protection quality.
Key Specifications:
- Multiple size options (8’x10′ to 16’x20′)
- Reaches full adhesive strength in 24 hours on damp surfaces
- Polyethylene construction with UV inhibitors
- Designed for temporary to medium-term repairs
Price Range: $70-$140 depending on size
Customer Feedback: Reviewers consistently mention how forgiving the EZ Tarp is during installation—you can reposition it slightly before the adhesive fully sets. Homeowners appreciate the clear installation instructions.
Pros:
✅ Most user-friendly application process
✅ Flexible sizing options for various needs
✅ Competitive pricing across size range
Cons:
❌ Lower wind rating than premium options
❌ Shorter effective lifespan (3-4 months)
5. RoofSnap QuickCover Adhesive Tarp
The RoofSnap QuickCover targets the DIY market with features specifically designed for homeowner installation. At 12’x12′, this adhesive tarp for roof applications hits the sweet spot for most residential repairs.
Key Specifications:
- 12’x12′ provides 144 square feet coverage
- Reinforced corner construction
- 95 MPH wind resistance rating
- Color-coded installation guide printed on tarp
Price Range: $95-$145
Customer Feedback: First-time users praise the visual installation guide that walks you through each step. The slightly smaller size makes solo installation possible, though having a helper certainly speeds things up.
Pros:
✅ Perfect size for typical roof damage
✅ Built-in installation instructions
✅ Reinforced stress points prevent tearing
Cons:
❌ Limited availability compared to major brands
❌ Mid-range wind protection
6. Dry Top Premium Adhesive Tarp
For extended coverage needs, the Dry Top Premium Adhesive offers 16’x20′ protection that bridges the gap between standard and commercial sizes. This roof tarp self adhesive solution targets serious weather preparation.
Key Specifications:
- 16’x20′ covers 320 square feet
- Enhanced UV stabilizers for longevity
- 105 MPH tested wind resistance
- Multi-layer polyethylene construction
Price Range: $110-$180
Customer Feedback: Users in storm-prone regions report Dry Top lasting through entire hurricane seasons with minimal degradation. The premium price point reflects genuine quality improvements over budget options.
Pros:
✅ Extended UV protection (up to 18 months)
✅ Excellent coverage-to-price ratio
✅ Heavy-duty construction resists punctures
Cons:
❌ Requires larger team for installation
❌ Higher upfront investment
7. Storm Shield Self-Stick Tarp
The Storm Shield Self-Stick serves budget-conscious homeowners who need reliable protection without premium pricing. This 10’x15′ self adhesive roof tarp proves you don’t have to break the bank for effective emergency coverage.
Key Specifications:
- 10’x15′ rectangular shape (150 sq ft)
- 90 MPH wind rating
- Basic UV protection (4-6 months)
- Standard polyethylene construction
Price Range: $65-$110
Customer Feedback: Customers appreciate Storm Shield as an affordable entry point into adhesive tarp technology. While it won’t win durability contests, it performs admirably for short to medium-term repairs.
Pros:
✅ Most affordable option in category
✅ Rectangular shape fits some repairs better
✅ Readily available at major retailers
Cons:
❌ Basic UV protection
❌ Lower wind resistance threshold
Understanding Self Adhesive Roof Tarp Technology
The innovation behind adhesive roof tarps represents a significant leap forward from traditional tarping methods. When I first learned about these products, I was skeptical—how could a sticky tarp possibly withstand hurricane-force winds? Let me explain the science that makes it work.
The Adhesive Science
Modern self adhesive roof tarp products use pressure-sensitive adhesives similar to those found in industrial construction tapes. These formulations typically consist of synthetic rubber or acrylic-based compounds that create molecular bonds with roofing surfaces. Unlike traditional glues that require chemical curing, pressure-sensitive adhesives activate immediately upon contact, yet allow for some repositioning during the first few minutes of application.
The perimeter adhesive strip—usually 2-4 inches wide—creates a waterproof seal against asphalt shingles, metal roofing, TPO membranes, and even concrete tiles. According to research from the National Roofing Contractors Association, properly installed adhesive tarps can maintain their seal integrity for 3-12 months depending on environmental conditions and product quality.
Material Construction Details
Quality adhesive tarps for roof applications feature multiple layers working in concert. The top layer uses UV-resistant polyethylene that prevents sunlight degradation—this is crucial because UV radiation breaks down standard plastics in just weeks. Mid-grade products typically use 5-mil thickness, while premium options jump to 7-mil or even 10-mil construction.
The flame-retardant additives in top-tier products like SMART-TARP aren’t just marketing fluff. These compounds prevent the tarp from becoming a fire hazard during electrical storms or if embers from nearby fires land on your roof. I’ve seen plenty of cheap tarps melt or catch fire, turning your protection into a liability.
Why Traditional Tarps Fall Short
You might wonder why self adhesive roof tarp solutions have become so popular when regular tarps cost $20. Here’s the brutal truth: traditional tarping requires driving fasteners into your already damaged roof, creating additional penetration points where water can enter. Every nail or screw becomes a potential leak source, especially when you remove the tarp later.
Sandbags and lumber strips—the old-school anchoring methods—create pressure points that can damage shingles and don’t seal against water infiltration. Wind gets under traditional tarps, creating lift forces that rip them loose during storms. The adhesive design eliminates these failure points entirely by creating a complete seal around the damaged area.
How to Choose the Right Self Adhesive Roof Tarp
Selecting the perfect adhesive roof tarp involves more than just picking the cheapest option on Amazon. I’ve developed a systematic approach that considers your specific situation and ensures you get adequate protection without overspending.
Size Calculation Method
Start by measuring your damaged area, then add at least 2 feet on all sides for proper overlap. A 6-foot hole requires a minimum 10×10 tarp, but I recommend sizing up to 12×12 for secure adhesion. For large-scale damage spanning 15+ feet, you’ll need to either use multiple overlapping tarps or step up to commercial sizes like the 20×25 UTARPit.
Here’s a pro tip: photograph your roof from multiple angles and use smartphone measurement apps for accurate dimensions. Guessing too small means you’ll need emergency runs to the store during bad weather—not fun.
Wind Rating Requirements
Match your tarp’s wind rating to your regional climate. Living in Florida or along the Gulf Coast? Don’t even consider anything below 100 MPH rating. Midwest tornado alley residents need similar high-end protection. Conversely, if you’re in California dealing with occasional rain, a 90 MPH-rated self adhesive roof tarp provides sufficient protection at lower cost.
The National Weather Service provides historical wind speed data for your area, helping you make informed decisions about necessary protection levels.
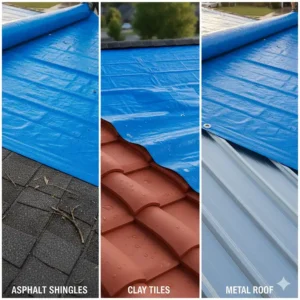
Roof Material Compatibility
Different roofing materials require specific adhesive formulations. Asphalt shingles work with virtually any self adhesive roof tarp, but metal roofing, rubber membranes, and tile roofs need specialized products. Check manufacturer specifications carefully—applying the wrong adhesive can damage your roof surface or fail to bond properly.
Duration of Protection Needed
Consider how long you need coverage. Emergency repairs during contractor delays might require 3-6 months of protection, while you might only need 2-4 weeks for minor fixes during busy construction seasons. Premium tarps with enhanced UV protection cost more upfront but prevent replacement expenses if repairs stretch longer than expected.
Budget-conscious shoppers can use basic adhesive tarps for roof applications expecting quick repairs, then upgrade to premium options if circumstances change. Just remember that removing and reapplying tarps wastes material and risks additional damage.
Installation Guide: Step-by-Step Process
Installing a self adhesive roof tarp correctly means the difference between effective protection and wasted money. I’ve installed dozens of these over the years, and I’ll share the techniques that ensure success even for first-timers.
Pre-Installation Preparation
Safety First: Never attempt roof work during active storms, on ice-covered surfaces, or in high winds. Use proper fall protection equipment—harnesses, safety lines, and non-slip footwear are non-negotiable. If you’re uncomfortable with heights or your roof pitch exceeds 6/12, hire professionals.
Surface Preparation: Remove loose debris, leaves, and standing water from the installation area. You don’t need a perfectly dry surface—most quality adhesive roof tarp products work on damp surfaces—but pooled water prevents proper adhesion. Use a push broom or leaf blower for quick cleanup.
Temperature Considerations: Adhesive performance suffers below 40°F and above 100°F. Ideally, install when temperatures range between 50-85°F. If you must install during extreme temperatures, some products like PIG Self-Adhesive work better in challenging conditions.
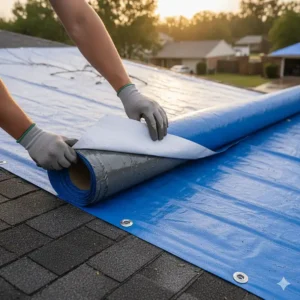
Application Technique
- Position the folded tarp on the roof with the adhesive side facing down. Don’t remove protective backing yet. Align it to cover all damaged areas plus your 2-foot overlap on all sides.
- Anchor the top edge first. Peel back 12-18 inches of protective backing along the top edge. Press firmly to create initial adhesion, working from center outward to eliminate air pockets.
- Progressive application. Working downward, peel the backing in 2-3 foot sections. Use steady pressure with a rubber roller or even your hands to activate the adhesive. Avoid rushing—proper bonding takes time.
- Smooth out wrinkles immediately. Wrinkles become permanent weak points where wind can catch. If you spot bubbles or creases, gently lift that section and reapply while the adhesive is still fresh.
- Seal the edges completely. Pay extra attention to perimeter sealing. Run your hands along every edge, applying firm pressure to ensure complete waterproof bonding. This step prevents wind from peeling the tarp loose.
Common Installation Mistakes
The biggest error I see is rushing the process. Taking an extra 15 minutes to ensure proper adhesion saves you from having to redo everything after the next rain. Another mistake is attempting solo installation on large tarps—anything over 12×12 really needs two people for proper alignment and smooth application.
Don’t stretch the tarp during installation. Let it lie naturally on the roof surface. Stretching creates tension that pulls the adhesive loose over time. Similarly, avoid installing in direct afternoon sunlight during summer—the intense heat can make the tarp difficult to handle and affects adhesive performance.

Maintenance and Longevity Tips
Once your self adhesive roof tarp is installed, proper maintenance extends its protective lifespan significantly. These aren’t set-it-and-forget-it solutions—a little attention goes a long way.
Weekly Inspection Protocol
Walk around your house every week to inspect the tarp from ground level. Look for lifting edges, discoloration indicating UV damage, or visible tears. Use binoculars if climbing the roof isn’t practical. Catching problems early—when you can still apply roof sealant or patches—prevents complete tarp failure.
After significant weather events, always perform immediate inspections. Even hurricane-rated adhesive roof tarp products can develop issues if debris impacts them during storms. Small repairs made promptly prevent major headaches later.
Edge Reinforcement Techniques
The perimeter edges receive the most stress from wind and thermal expansion. I recommend applying roofing cement along the edges after the first week of installation. This additional seal costs $10 and adds months to your tarp’s lifespan. Some professionals use caulking guns to create neat, weather-resistant edge seals.
For tarps expected to last multiple months, consider applying adhesive roof tape along all edges. This layered protection approach is particularly valuable in harsh climates where single-layer adhesive might deteriorate faster.
When to Replace vs. Repair
Minor tears or punctures under 2 inches can be patched with specialized tarp repair tape. Larger damage, significant UV degradation (visible as brittleness or discoloration), or adhesive failure along more than 20% of the perimeter indicates it’s time for complete replacement.
Don’t push your self adhesive roof tarp beyond its rated lifespan. A tarp rated for 6 months might survive 8-9 months in ideal conditions, but don’t count on it. Planning replacement before catastrophic failure prevents emergency water damage repairs that cost exponentially more than a new tarp.
Cost Analysis: Investment vs. Value
Understanding the true cost of adhesive tarp protection requires looking beyond sticker prices. Let me break down the complete financial picture so you can make smart purchasing decisions.
Initial Purchase Costs
Budget options start around $65-$80 for basic 10×10 coverage, while premium products reach $150-$180 for enhanced features and larger sizes. Mid-range products like UTARPit typically run $90-$120, offering excellent value for most residential applications.
Compare this to professional emergency tarping services at $1.00-$2.80 per square foot according to HomeGuide’s 2025 cost data. A 150 square foot tarp area would cost $150-$420 for professional installation—plus you’re paying for labor. Self-installation of a roof tarp self adhesive saves those labor charges entirely.
Long-Term Value Considerations
Here’s where the math gets interesting. A $120 self adhesive roof tarp that prevents $5,000 in water damage delivers a 4,000% return on investment. Even if you replace it once during an extended repair period, you’re still dramatically ahead financially.
Traditional tarps might cost less upfront ($20-$40), but they require anchoring materials (lumber, straps, weights) adding $30-$50, plus the installation time and skill needed. Factor in the risk of additional roof damage from fasteners, and traditional methods often cost more in the long run.
Insurance Implications
Many homeowners don’t realize that temporary protective measures like adhesive roof tarp installations can affect insurance claims positively. Demonstrating proactive damage mitigation might reduce your deductible or prevent claim denials based on negligence. Document your tarp installation with photos and receipts—this evidence proves you took reasonable steps to prevent further damage.
Conversely, failing to protect damaged roofs can result in claim denials for subsequent water damage that occurs after the initial covered event. Spending $100 on a quality self adhesive roof tarp now could save you from losing a $15,000 interior water damage claim later.
Climate-Specific Considerations
Your regional climate dramatically impacts which adhesive roof tarp performs best. Let me walk you through considerations for different environmental challenges.
Hurricane-Prone Regions
Gulf Coast and Atlantic seaboard residents need nothing less than 110 MPH-rated products. The SMART-TARP and UTARPit models specifically pass TAS-100A testing, which simulates sustained hurricane conditions including wind-driven rain. Don’t gamble with budget options in these areas—the next storm will expose any weaknesses.
Hurricane preparation also means maintaining shelf-ready tarps before storm season. Products with 3-year shelf lives let you stock up during off-season sales without worrying about adhesive degradation before you need them.
Snow and Ice Climates
Northern climates present unique challenges. Freezing temperatures reduce adhesive effectiveness, so you’ll want products specifically rated for cold-weather application like the PIG Self-Adhesive. Snow loading adds weight that cheaper tarps can’t handle—their adhesive fails under sustained pressure.
Ice dams create particular problems. Self adhesive roof tarp products can prevent additional water infiltration from ice dam leaks, but you need to clear ice away from the damaged area before installation. The tarp won’t adhere to ice surfaces, obviously.
Hot and Arid Environments
Desert and Southwest residents face intense UV exposure that destroys standard tarps in weeks. Premium products with enhanced UV stabilizers become essential—the extra $30-$40 cost is worthwhile when your tarp lasts 12 months instead of 3. White or light-colored tarps like the PIG model reflect sunlight, reducing heat buildup that accelerates degradation.
Dust storms create abrasion that wears through thin tarps. Opt for 7-mil or thicker construction if you’re dealing with frequent high-wind dust events. The adhesive roof tarp market has evolved specifically to handle these regional variations.
Humid Coastal Areas
Coastal humidity doesn’t significantly affect modern adhesive formulations, but salt air accelerates material breakdown. Look for products advertised as “marine-grade” or with enhanced corrosion resistance. Regular rinses with fresh water after salt spray events extend tarp life considerably.
Coastal areas also experience sudden, intense thunderstorms. Quick-application products like EZ Tarp let you install protection rapidly when storms appear on radar, rather than spending hours with traditional tarping methods during worsening conditions.
DIY vs. Professional Installation
Deciding whether to install your self adhesive roof tarp yourself or hire professionals depends on several factors beyond just cost savings.
When DIY Makes Sense
Single-story homes with low-pitch roofs (4/12 or less) are perfect DIY candidates. If you’re reasonably comfortable on ladders and have basic safety equipment, installation takes 30-60 minutes. Modern adhesive tarp for roof products are designed specifically for homeowner installation—the peel-and-stick simplicity requires no special skills.
Small to medium damage areas (under 200 square feet) work well for DIY approaches. You can handle a 10×10 or even 12×12 tarp solo, though having a helper makes alignment easier. DIY saves you $200-$500 in labor costs, which could go toward a higher-quality tarp instead.
When to Call Professionals
Two-story homes, steep pitches (over 7/12), or large damage areas warrant professional installation. The safety risks simply aren’t worth the cost savings. Professional roofers have proper fall protection equipment, insurance coverage, and experience working at heights safely.
If you’re physically unable to climb ladders or have any health conditions affecting balance, hire professionals without hesitation. Similarly, damage occurring during active weather or at night requires emergency professional services—don’t attempt roof work in dangerous conditions.
Complex roof configurations with multiple valleys, dormers, or obstacles benefit from professional expertise. They understand how to properly overlap multiple tarps, seal around protrusions, and ensure complete protection in challenging situations.
Finding Quality Installation Services
When hiring professionals for roof tarp self adhesive installation, verify they carry proper licensing and insurance. Request references and check reviews on platforms like the Better Business Bureau. Get written estimates from 3-5 contractors before committing.
Be wary of storm-chasing contractors who appear after disasters offering suspiciously low prices. These operators often do substandard work and disappear before problems emerge. Established local roofing companies provide better reliability and accountability.
Comparing Self Adhesive vs. Traditional Tarps
Let me lay out the honest comparison between modern adhesive solutions and old-school tarping methods. Both have their place, but understanding the differences helps you choose appropriately.
| Feature | Self Adhesive Roof Tarp | Traditional Tarp Methods |
|---|---|---|
| Installation Time | 30-60 minutes | 2-4 hours |
| Tools Required | None | Hammer, nails, lumber, straps |
| Wind Resistance | 90-110 MPH (tested) | Varies, often under 70 MPH |
| Roof Damage Risk | Minimal | High (nail/screw penetrations) |
| Waterproof Seal | Complete perimeter seal | Gaps at anchor points |
| Cost (materials) | $65-$180 | $20-$70 |
| Reusability | Single use | Multiple uses possible |
| Professional Labor | $0 DIY / $100-$200 pro | $150-$500 typical |
Performance Differences
The waterproof seal is where self adhesive roof tarp products truly shine. Traditional tarps rely on weight and friction to stay in place, but they don’t seal against water infiltration. Every anchor point becomes a potential leak source, and wind-driven rain finds these gaps easily.
Adhesive tarps create molecular bonds with your roof surface, forming a continuous waterproof membrane. Think of it like a giant bandage for your roof—the complete seal prevents moisture penetration that traditional methods can’t achieve.
Removal and Roof Impact
Here’s a consideration many homeowners overlook: removal aftermath. Traditional tarps come off cleanly since they’re just sitting on top, but they leave behind all those nail holes requiring repair. Each penetration becomes a permanent weak point in your roof.
Self adhesive roof tarp removal requires care to avoid damaging shingles, but modern formulations release reasonably well after 3-6 months. Some shingle granule loss is possible, though this typically doesn’t compromise roof integrity. Premium products like SMART-TARP minimize removal damage through specialized adhesive formulations.
When Traditional Methods Work Better
I’ll be honest—traditional tarps excel in specific scenarios. If you need long-term coverage exceeding 12 months, traditional methods with properly installed fasteners might outlast adhesive options. For flat commercial roofs where penetrations don’t create leak risks, weighted traditional tarps work fine.
Budget-conscious property owners with multiple buildings might prefer traditional reusable tarps that can be moved between structures. However, for single-family emergency protection, the self adhesive roof tarp advantages usually outweigh traditional methods significantly.
Emergency Preparedness: Stocking for Storm Season
Smart homeowners in weather-prone regions keep adhesive roof tarp supplies on hand before disasters strike. Let me share strategies for effective emergency preparedness that don’t break the bank.
Pre-Season Purchasing Strategy
Buy your tarps during off-season when prices drop 20-30%. January through March offers the best deals for hurricane supplies, while September through November is ideal for winter storm preparations. Retailers clear inventory during these periods, passing savings to savvy shoppers.
Stock at least one tarp sized for your roof’s typical damage scenarios. A 10×10 self adhesive roof tarp handles most residential emergencies adequately. If you live in high-risk areas, consider maintaining two different sizes—a smaller 10×10 for minor damage and a larger 16×20 or 20×25 for major events.
Storage Guidelines
Proper storage extends tarp shelf life to its full rated duration. Keep tarps in climate-controlled spaces between 40-85°F. Garages work fine in most climates, but avoid storing in uninsulated attics where summer temperatures exceed 120°F—heat degrades adhesives prematurely.
Store tarps in their original packaging to protect from dust and moisture. Stack them flat rather than folding tightly, which can create adhesive cold-welds that make unfurling difficult. Label each tarp with purchase date and size for quick identification during emergencies.
Complete Emergency Kit
Your roof tarp self adhesive supply should be part of a comprehensive emergency kit. Include:
- Heavy-duty scissors or utility knife for opening packaging
- Work gloves for handling during installation
- Binoculars for post-storm damage assessment
- Safety equipment (harness, rope, non-slip shoes)
- Smartphone with measurement app
- Flashlight for low-light inspections
- Roofing cement for edge reinforcement
- Emergency contact list (contractors, insurance agent)
Community Resource Sharing
Consider organizing neighborhood emergency supply cooperatives. Pooling resources with 4-5 neighbors lets you stock diverse tarp sizes while splitting costs. During emergencies, having access to multiple sizes and types of adhesive roof tarp products means everyone gets appropriate protection without emergency shopping runs.
Document your preparations with photos and maintain records for insurance purposes. This documentation proves proactive maintenance, potentially affecting premiums favorably and streamlining claims processes after covered events.
Common Problems and Solutions
Even the best self adhesive roof tarp installations can encounter issues. Here are the problems I see most frequently and how to resolve them effectively.
Edge Lifting Issues
Problem: Tarp edges peel loose after installation, typically starting at corners.
Solution: Apply roofing cement along lifted sections immediately. Clean the exposed roof surface with a rag, spread a thin layer of cement, and press the tarp edge firmly back into place. Hold pressure for 30 seconds. For chronic lifting, install adhesive roof tape over the problem areas as secondary protection.
Prevention: Ensure thorough edge sealing during initial installation. Cold weather and high-wind installation increase lifting risks—wait for calmer conditions when possible.
Adhesive Failure in Wet Conditions
Problem: Tarp won’t stick properly to damp roof surfaces.
Solution: Most quality products work on damp (not wet) surfaces, but application requires more time. Apply extra pressure during installation and allow 24 hours before expecting full bonding strength. If you must install during rain, select products specifically rated for wet application like the PIG Self-Adhesive.
Prevention: Remove standing water before installation. Use push brooms or squeegees to clear puddles, leaving only surface dampness.
Punctures and Tears
Problem: Wind-blown debris punctures the tarp, creating leak points.
Solution: Clean the damaged area thoroughly and apply specialized tarp repair tape, available at hardware stores for $8-$15. Cut patches 2 inches larger than the hole on all sides. For holes larger than 4 inches, consider replacing the entire tarp—patches on large tears rarely hold long-term.
Prevention: Trim overhanging tree branches before storm season. Remove debris from the tarp surface weekly to prevent grinding action during wind events.
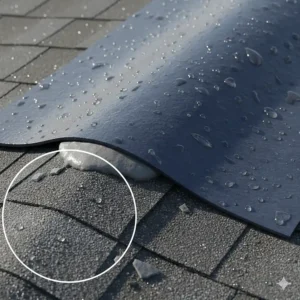
UV Degradation
Problem: Tarp becomes brittle, discolored, or develops surface cracking after extended sun exposure.
Solution: UV degradation indicates end-of-life for your self adhesive roof tarp. Replace it immediately—degraded tarps fail catastrophically during storms rather than gradually. Don’t attempt repairs on UV-damaged tarps.
Prevention: Choose premium products with enhanced UV stabilizers if extended coverage is anticipated. White or reflective tarps like the PIG model resist UV damage better than blue options.
Wrinkles and Air Bubbles
Problem: Air pockets form under the tarp, creating weak spots.
Solution: If caught during installation, lift the affected section and reapply with smooth, outward strokes. For bubbles discovered after adhesive sets, puncture them with a small needle and press out the air. Seal the puncture with repair tape.
Prevention: Take your time during installation. Work methodically from center to edges, using steady pressure to eliminate air as you go. Don’t rush—an extra 10 minutes ensures proper bonding.
Environmental Impact and Sustainability
As someone who cares about environmental responsibility, I’ve researched the ecological footprint of adhesive roof tarp products. The picture is complex, involving both benefits and drawbacks.
Material Lifecycle Considerations
Most self adhesive roof tarp products use virgin polyethylene plastic, which isn’t biodegradable and contributes to landfill waste after single-use application. This reality troubles environmentally conscious homeowners, myself included. However, consider the alternative: water damage requiring replacement of drywall, insulation, flooring, and structural materials generates far more waste and environmental impact.
A $100 tarp preventing $10,000 in water damage ultimately delivers significant environmental benefit through waste avoidance. The energy and resources required to manufacture, transport, and install replacement building materials dwarf the environmental cost of the tarp itself.
Recycling Potential
Unfortunately, adhesive-backed tarps pose recycling challenges. The mixed materials—polyethylene film combined with pressure-sensitive adhesives—don’t fit standard recycling streams. Most municipalities classify them as general waste. However, some regions offer specialty plastic film recycling programs that accept clean tarps if you remove them carefully without excessive dirt contamination.
Check with local waste management authorities about specialty recycling options. Some innovative companies are developing programs to repurpose used tarps into secondary products, though these initiatives remain limited as of 2025.
Sustainable Alternatives
The roofing industry is exploring bio-based adhesives and recycled content tarps, but these products haven’t achieved mainstream availability yet. Current eco-friendly options sacrifice performance—lower wind ratings, reduced UV protection, and shorter lifespans. For emergency protection, performance must take priority over environmental idealism.
You can make sustainable choices within current options by selecting appropriately-sized products that avoid waste, choosing premium tarps that last longer before requiring replacement, and properly maintaining your roof tarp self adhesive to maximize its protective lifespan.
Legal and Insurance Considerations
Navigating the legal and insurance aspects of roof damage and temporary repairs can be tricky. Let me clarify the important points you need to understand.
Insurance Coverage Details
Most homeowners insurance policies cover sudden, accidental damage from covered perils like storms, falling trees, or fire. However, they typically won’t cover gradual damage from lack of maintenance or wear and tear. This distinction makes temporary protection with a self adhesive roof tarp crucial from an insurance perspective.
When damage occurs, you have a legal duty to mitigate further losses. Installing protective tarps demonstrates good faith compliance with this obligation. Document everything: photograph the damage before and after tarp installation, save all receipts, and maintain a timeline of events. This documentation supports your claim and proves you took reasonable steps to prevent additional damage.
Permit Requirements
Temporary protective measures like adhesive roof tarp installations typically don’t require building permits since they’re emergency repairs rather than permanent modifications. However, regulations vary by municipality. Some jurisdictions have specific requirements for temporary structures remaining in place beyond 30-90 days.
Contact your local building department if your repairs will extend beyond a few weeks. The last thing you need is code enforcement issues complicating your insurance claim. Most officials understand emergency situations and won’t hassle homeowners using approved temporary protection methods.
Contractor Liability Issues
If you hire professionals to install your self adhesive roof tarp, ensure they carry adequate liability insurance. Request certificates of insurance before work begins. This protects you if accidents occur during installation or if improper installation causes additional damage.
Conversely, if you choose DIY installation, understand that you assume responsibility for proper execution. Your homeowners insurance should cover accidents that occur during reasonable maintenance activities, but verify this with your agent. Some policies exclude coverage for injuries during roofing work, considering it inherently hazardous.
HOA Restrictions
Homeowners associations sometimes impose restrictions on temporary repairs, particularly regarding appearance and duration. Review your HOA covenants before installing tarps visible from the street. Most associations allow emergency protection but may require notification or limit how long tarps can remain in place.
If your HOA objects to necessary emergency protection, document your communications and consult your insurance agent. Insurance requirements for damage mitigation typically supersede HOA aesthetic concerns, though navigating this diplomatically produces better outcomes.
Advanced Tips from Professional Roofers
After consulting with experienced roofing contractors, I’ve gathered insider knowledge that separates adequate installations from exceptional ones.
Optimal Weather Windows
Professional installers watch weather forecasts closely, timing installations for maximum adhesive performance. The ideal window is 48 hours of dry weather with temperatures between 60-75°F. This allows the adhesive to achieve full bonding strength before facing weather challenges.
If immediate installation is necessary during suboptimal conditions, professionals use supplemental techniques like edge sealing with roofing cement or applying adhesive tape along perimeters. These redundant protection layers compensate for reduced adhesive performance in challenging conditions.
Surface Preparation Secrets
Beyond basic cleaning, pros use specific techniques to enhance adhesion. For dusty surfaces, they wipe areas with slightly damp rags to capture fine particles without creating wetness. On rough surfaces with significant texture, they apply moderate pressure during installation to ensure adhesive contacts the surface peaks rather than bridging over valleys.
For metal roofs, professionals sometimes use mild detergents to remove oxidation and oil films that prevent proper bonding. Rinse thoroughly and allow 30 minutes of drying before applying your roof tarp self adhesive for best results.
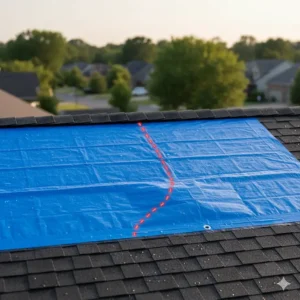
Strategic Overlapping Techniques
When using multiple tarps to cover large areas, overlap direction matters significantly. Always overlap in the direction water flows—upper tarps should overlap lower tarps by at least 6 inches. This shingle-effect prevents water from finding gaps and infiltrating under the protective layer.
Seal overlap seams with roofing cement or specialized tarp tape. This creates a continuous waterproof membrane rather than individual tarp sections. Professional installers never rely solely on adhesive strips at overlap points—supplemental sealing is non-negotiable for quality installations.
Temperature Compensation Methods
Experienced contractors adjust installation techniques based on ambient temperature. In cold weather, they warm tarps indoors before installation—room-temperature tarps conform better and achieve stronger initial adhesion. Some pros even use heat guns on low settings to warm roof surfaces slightly before applying adhesive tarps in cold conditions.
During hot weather, they work in shade when possible and avoid stretching tarps that become more pliable in heat. Evening installations during summer allow tarps to cool and settle overnight, reducing thermal stress that can affect adhesive bonding.
Future Innovations in Roof Protection
The self adhesive roof tarp market continues evolving with exciting technological developments. While these innovations haven’t reached mainstream availability, they offer glimpses of future protection options.
Smart Tarp Technology
Several manufacturers are developing tarps with embedded sensors that monitor for leaks, wind stress, and UV degradation. Connected to smartphone apps, these systems alert homeowners when protection is compromised, enabling proactive maintenance before failures occur. Expected market entry is late 2026 with premium pricing initially.
Enhanced Adhesive Formulations
Research into bio-based adhesives derived from plant resins shows promise for more environmentally sustainable products without sacrificing performance. Early prototypes demonstrate wind resistance comparable to synthetic adhesives while offering improved removability and reduced roof surface damage.
Self-Sealing Materials
Innovative polymers that automatically seal small punctures and tears could revolutionize temporary roof protection. Similar to self-healing car paint, these materials use microencapsulated sealants that activate when damaged, eliminating the need for manual patching of minor damage.
Integration with Permanent Roofing
Some forward-thinking companies explore adhesive tarp for roof applications that integrate with eventual permanent repairs. These systems use compatible adhesives that don’t require complete removal before installing new shingles, reducing labor costs and waste when transitioning from temporary to permanent protection.
While these innovations sound exciting, current proven technology remains your best bet for immediate protection needs. Stick with established products like SMART-TARP, UTARPit, and PIG Self-Adhesive that have track records of reliable performance rather than waiting for future developments.
FAQs About Self Adhesive Roof Tarp
❓ How long can a self adhesive roof tarp stay on my roof safely?
❓ Can I install adhesive roof tarp in cold weather below freezing?
❓ Will removing self adhesive roof tarp damage my shingles?
❓ Do self adhesive roof tarp products work on metal roofs?
❓ Can I reuse a self adhesive roof tarp after removing it?
Conclusion: Making Your Protection Decision
Choosing the right self adhesive roof tarp comes down to matching product capabilities with your specific situation. Throughout this guide, I’ve shared real-world insights from years of experience with these innovative protection solutions.
For most homeowners, mid-range options like the UTARPit Blue Roofing Tarp or EZ Tarp Adhesive deliver excellent value—adequate protection without premium pricing. If you live in hurricane-prone regions or need extended protection, investing in the SMART-TARP Self-Adhering Roof Tarp pays dividends through superior wind resistance and longevity. Budget-conscious shoppers can start with the Storm Shield Self-Stick for basic protection, upgrading later if repair timelines extend.
Remember that a $100 investment in quality temporary protection prevents thousands in water damage repairs. The peace of mind knowing your home is secured against the elements while you arrange permanent repairs is invaluable. Don’t gamble with cheap solutions that fail during the next storm—your home deserves proven protection.
The adhesive tarp technology has matured significantly, offering reliable performance when you follow proper installation and maintenance practices. Whether you choose DIY installation or hire professionals, the key is acting quickly when damage occurs. Every day your roof remains unprotected increases the risk of compounding damage that turns minor repairs into major reconstruction projects.
🏡 Protect Your Home Today—Don’t Wait for the Next Storm!
⚡ Your roof is your home’s first line of defense. Check out the products recommended in this guide and secure the protection you need before weather strikes again. Click any product name to view current prices, read customer reviews, and get fast shipping. Your family’s safety and your home’s integrity are worth the investment! 🛡️
Recommended for You
- Tarp Repair Kit: 7 Best Picks to Fix Tarps Fast in 2025
- Tarp Straps: 7 Best Heavy-Duty Options That Actually Work (2025)
- Tarp and Pole: 7 Best Kits Tested & Ranked 2025
Disclaimer: This article contains affiliate links. If you purchase products through these links, we may earn a small commission at no additional cost to you.
✨ Found this helpful? Share it with your friends! 💬🤗